



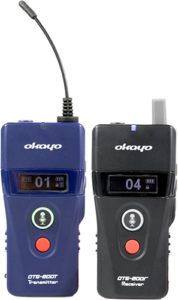
Okayo OTG-200
1. System Diagram
1.1 Transmitter (Tx)
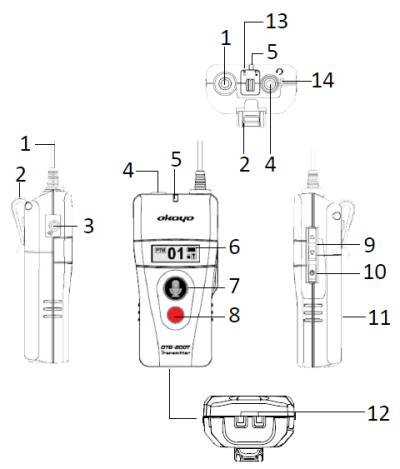
- Antenna
- Belt Clip
- 3.5 mm TRS Audio Line Jack¹
- 3.5 mm TRRS Headset Jack²
- Status/Signal Indicator
- 0.9" OLED Display
- Microphone On/Off Button
- Call Button
- Up/Down Button
- Power Button
- Battery Compartment³
- Charging Contacts⁴
- Switch (Master/Slave)
- Built-in Microphone
1.2. Receiver (Rx)
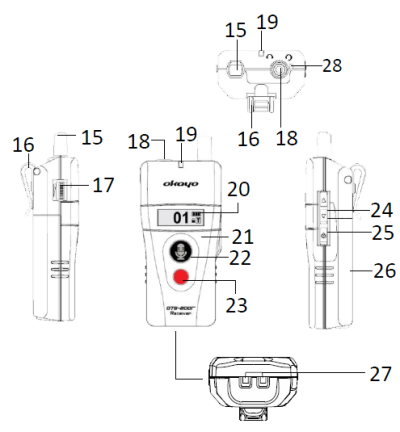
- Antenna
- Belt Clip
- Volume Potentiometer
- 3.5 mm TRRS Headset Jack²
- Status/Signal Indicator
- 0.9" OLED Display
- Built-in Vibrator
- Microphone On/Off Button (Push-To-Talk Only)
- Alarm Off Button
- Up/Down Button
- Power Button
- Battery Compartment³
- Charging Contacts⁴
- Built-in Microphone
1.3. Transmitter Display (Tx)
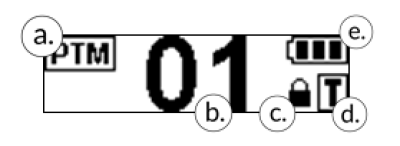
- Microphone Mode
- Channel Number
- Channel Change Lock
- Communication Mode (G, T, D)
- Battery Status⁵
1.4. Receiver Display (Rx)
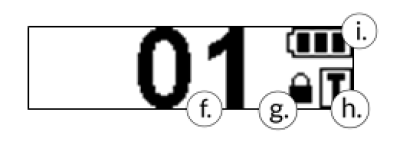
- Channel Number
- Channel Change Lock
- Transmitter Communication Mode (G, T, D)
- Battery Status⁵
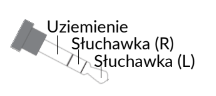
1 TRS
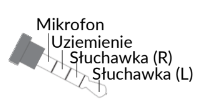
2 TRRS
3 Powered by 2 AA alkaline batteries or 2 AA Ni-MH rechargeable batteries.
4 Wide range of available chargers for collective device charging.
5 Battery charge indicator.

2. LED Indicator
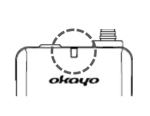
| Action | Function |
|---|---|
|
Solid Blue |
Signal Reception |
|
Slow Flashing Blue |
No Signal in Receiver |
|
Fast Flashing Blue |
Advanced Operations in Progress |
|
Flashing or Solid Red |
Low Battery Level |
|
No Light |
Device is Off |
3. Microphone Indicator
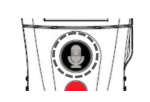
| Color | Function |
|---|---|
|
Green |
Microphone is On |
|
Red |
Microphone is Off |
|
Flashing Red |
Roll-Call/Alarm/Out-Of-Range Alarm Activated |
|
No Light |
No Ability to Speak Through Microphone |
4. Group Pairing with Advanced Functions
⚠ Important
Ensure that devices are turned off before pairing.
Step 1
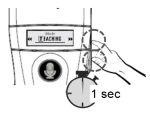
Select the communication mode on the transmitter. Press and hold the ▼ and power buttons simultaneously to start the transmitter. Then select the communication mode (see table below) using the ▲▼ buttons. Press the power button to confirm the selection.
| Mode | Number of Transmitters per Channel |
|---|---|
|
Guiding |
Only 1 transmitter per channel. |
|
Teaching (Default) |
2 transmitters per channel. |
|
Discussing |
Unlimited number of transmitters per channel. |
Step 2
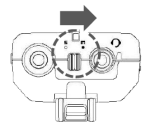
Ensure that the switch on the transmitter is set to the "m" position.
| Mode | Number of Transmitters per Channel |
|---|---|
|
Guiding |
Switch on transmitter set to "m" position – one-way communication. |
|
Teaching |
Switch on transmitter set to "m" position for main transmitter, "s" position for additional transmitter. User of "s" transmitter can enable receiver users to communicate back (1 receiver at a time). |
|
Discussing |
Switch does not apply to this mode. Any 2 transmitter users in the group can speak to the group. Receiver users can only listen. |
Step 3
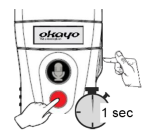
After selecting the communication mode, turn off the transmitter. Then restart it by pressing the Call and power buttons simultaneously to activate the pairing function.
Step 4
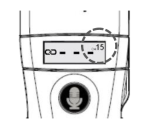
Use the △ ▽ buttons to select the channel (within 3 seconds), then confirm the selection by pressing the power button. The transmitter begins sending a pairing signal to the receivers.
Step 5
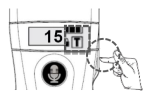
Now turn on the receivers one by one by pressing the power button. The receiver display will show the same communication mode as the transmitter. The receivers are ready to operate.
Step 6
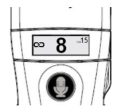
Turning on the second transmitter for teaching mode.
Repeat steps 1 ~ 4 to turn on transmitter No. 2 and select the same channel number as transmitter No. 1. Transmitter No. 2 will automatically retrieve the paired receiver list from transmitter No. 1.
Step 7
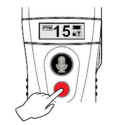
Briefly press the Call button on the transmitter or both transmitters*.
Your group is ready to operate!
* Set the transmitter roles appropriately after pairing. See STEP 2.
4. Advanced Functions (Does Not Apply to Discussing Mode)
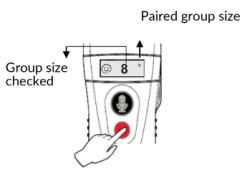
4.1. Check Your Group's Attendance
Briefly press the Call button to check or exit.
4.2. Activate Alarm in Receivers
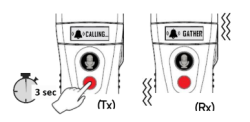
Press and hold the Call button for 3 seconds to activate the alarm. The receiver will activate 30-second vibrations. Press the Call button again on Tx and Rx to turn off.
4.3. Signal Loss Alarm
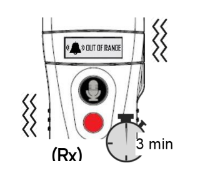
Rx will be alerted with 30-second vibrations if it loses signal from the Tx transmitter for 3 minutes. Returning to the transmitter's range or briefly pressing the Call button on Rx will turn off the alarm.
5. General Operating Instructions
5.1. Communication via Rx Receiver
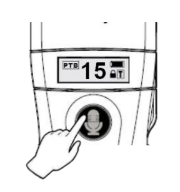
The receiver user can communicate with the group via the PTT (Push-To-Talk) microphone. Press and hold the microphone button. The microphone button lights up green, indicating that the group can hear you.
⚠ Note
1. You can use the built-in microphone in the receiver (optimal distance is 3 ~ 5 cm from the receiver) or connect a headset.
2. Check whether the transmitter has allowed two-way communication for receivers.
5.2. Manual Channel Number Change
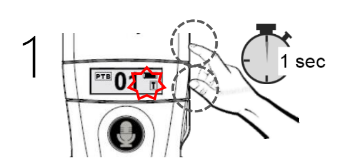
Press and hold the ▲ and ▼ buttons simultaneously until the 🔒︎ symbol disappears from the display.
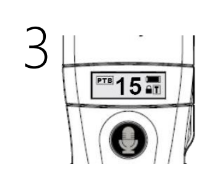
Select a new channel using the ▲▼ buttons.
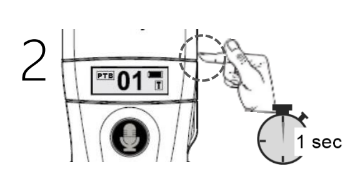
The new channel will be automatically confirmed after 1 second.
5.3. Remote Group Channel Unification Without Advanced Functions (Optional)
⚠ Important
Does not apply to previously paired device groups.
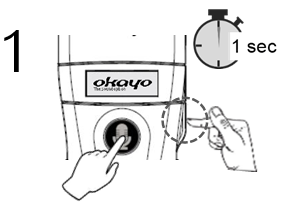
Press and hold the microphone and power buttons simultaneously to turn on Tx.
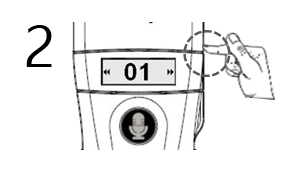
Select the channel using the ▲▼ buttons.
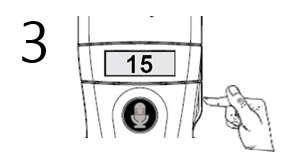
Confirm this new channel by pressing the power button. Then turn on the Rx receivers.
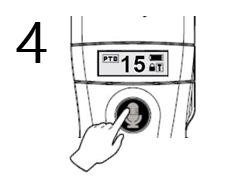
Press the microphone button to exit this mode after pairing all Rx receivers.
5.4. Volume Adjustment
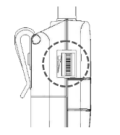
⚠ Note
Adjust headphone volume using this volume control on the receiver.
Note: Listening to loud sound for extended periods may cause hearing damage.
5.5. Connecting External Audio
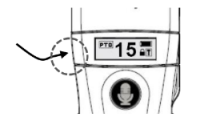
Connect an additional 3.5 mm audio cable to the line jack on Tx to transmit audio
5.6. Turning Off Devices
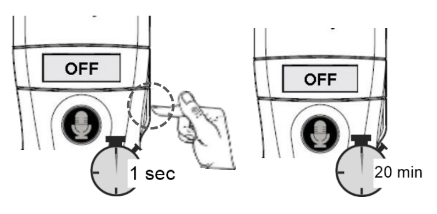
Press and hold the power button for 1 second to turn off the device. The receiver will turn off automatically if it loses signal from the transmitter for 20 minutes.
6. Settings
Several device settings can be adjusted to user preferences.
⚠ Important
Devices must be turned off before entering the settings panel.
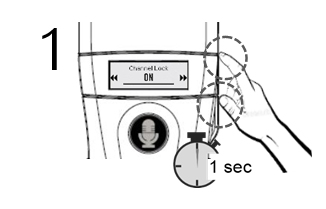
Press the ▲ and power buttons simultaneously to turn on.
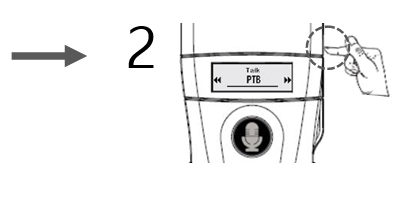
Select a setting using ▲▼. Confirm by pressing the power button.
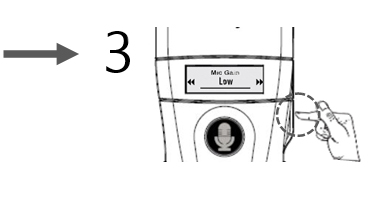
After selecting the last setting, the device will automatically turn on.
- The channel will be automatically locked after power-on.
- Microphone Button Function Mode:
- PTB: Press to turn microphone on/off;
- PTT: Press and hold button to speak;
- PTM: Press and hold button to mute microphone.
- Adjust microphone sensitivity to your preferences (lowest: 1; highest: 5).
- Adjust signal power to conditions: Hi – 20 mW, Low – 10 mW.
- Microphone will be muted when audio is streamed through the 3.5 mm audio line jack.
- Turn off automatically if there is no signal from Tx transmitter for 20 minutes.
- Turn on automatically after removal from charger.
- Alarm activated if there is no signal from Tx transmitter for 3 minutes.
- Higher volume available for HAC users.
7. Troubleshooting
| Symbol on Display | Description |
|---|---|
|
|
Tx has not previously paired its group. See GROUP PAIRING section to complete group pairing. |
|
|
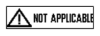
This function does not apply. |
|
|
Information for "Discussing" mode. Max. 2 speakers at the same time. Wait until one of them is muted to properly free up space for the next user. |
|
|
Transmitter No. 2 did not obtain the paired receiver list from transmitter No. 1. Turn off transmitter No. 2 and start it correctly according to the instructions. |



Receiver Does Not Hear Transmitter
- Ensure that the volume is properly set on the receiver.
- Ensure that both the transmitter and receiver are set to the same channel.
- Ensure that both the transmitter and receiver are in the same communication mode (G, T, or D).
Receiver Cannot Speak
- In "G" mode, ensure that the "s" switch is set on the transmitter.
- In "T" mode, ensure that transmitter No. 2 (role switch in "s") is muted.
- Rx cannot speak in "D" mode.
Transmitter Cannot Remotely Unify Its Group Channel
- In "G" or "T" mode, ensure that the "m" switch is set.
- In "D" mode, ensure that no second transmitter is occupying the channel.
Incorrect Group Size During Attendance Check
Transmitter cannot detect a receiver that may be accidentally turned off or is out of the transmitter's range.
Transmitter Does Not Transmit Its Conversation Properly When Muted
- Transmitter with "m" switch always occupies 1 of 2 slots in full-duplex communication, even when muted.
- Disconnect the audio cable (3.5 mm line jack) from the transmitter with "s" switch.
8. Technical Specifications
8.1. General
| Parameter | Value |
|---|---|
|
Frequency Band |
823 ~ 832 MHz & 863 ~ 865 MHz |
|
Emission Modulation |
GFSK |
|
Number of Channels |
42 |
|
Number of Simultaneous Channels |
20 |
|
Bandwidth |
250 kHz |
|
Full-Duplex Communication |
max. 2 users |
|
Number of Users per Channel |
unlimited |
|
Transmission Band |
300 Hz ~ 4.5 kHz |
|
T.H.D. |
< 7% |
|
Latency |
< 25 ms |
|
Line-of-Sight Range |
< 100 m |
|
Power Type |
2x AA alkaline 1.5 V / 2x Ni-MH AA 1.2 V |
|
Charging Time |
6 ~ 8 hours for Ni-MH 2000 mAh |
|
Display |
0.9" OLED |
|
Dimensions |
95 x 46.5 x 32 mm |
|
Weight Without Batteries |
55 ± 5 g |
8.2. Transmitter (Tx)
| Parameter | Value |
|---|---|
|
Signal Output Power |
10 mW/20 mW |
|
Built-in Microphone |
electret condenser |
|
Headset Jack |
3.5 mm TRRS jack |
|
Aux-in Jack |
3.5 mm TRS jack |
|
Operating Time |
>15 hours |
8.3. Receiver (Rx)
| Parameter | Value |
|---|---|
|
Signal Output Power |
10 mW |
|
Built-in Microphone |
electret condenser |
|
Headphone Jack |
3.5 mm TRS jack |
|
Operating Time |
>20 hours |