



Okayo WT-300 G2
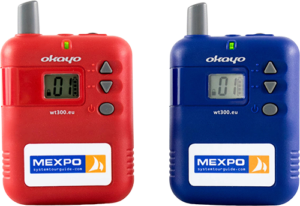
1. Illustration
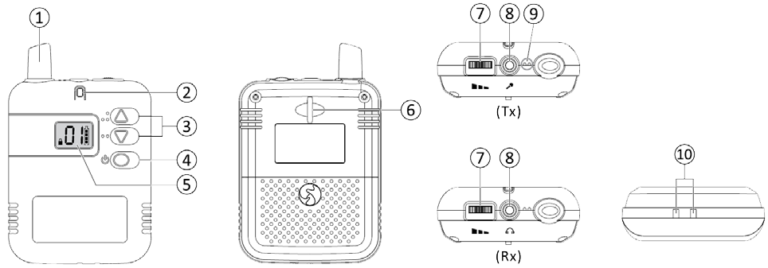
- Antenna
- LED Indicator:
Transmitter (Tx) – power:- Green: sufficient power
- Red: insufficient power
- Green: sufficient power and Tx signal received
- Red: insufficient power and no Tx signal
- No LED: Tx signal NOT received
- Up / down button
- Power / settings button
- Backlit display
- Lanyard hole
- Microphone volume control (Tx) / Headphone volume control (Rx)
- 3.5 mm microphone jack (Tx) / 3.5 mm headphone jack (Rx)
- Built-in microphone (Tx only)
- Charging port
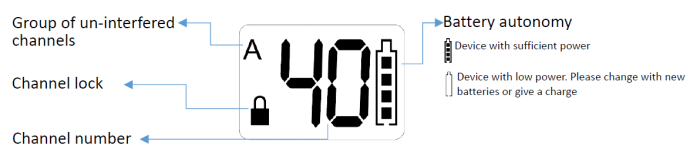
2. Display
3. General Operating Instructions
3.1. Power On
Press the power button for 1 second to turn on the device.
3.2. Unlock and Adjust Channel
When the device is on, press AND hold the ▲ and ▼ buttons until the symbol disappears. Press the ▲ and ▼ buttons briefly to select another preferred channel. The channel will be automatically locked after 1 second of inactivity.
3.3. Set Microphone / Headphone Volume
Adjust the volume control at the top of the device to set the microphone / headphone volume.
⚠ Warning
Listening at high volume for extended periods may damage your hearing.
3.4. Power Off
Press the power button for 2 seconds to turn off the device.
3.5. Activate Out-of-Range Alarm (Rx only) (optional)
Receivers activate the out-of-range alarm if they do not receive a signal from a compatible transmitter for 1 minute.
⚠ Warning
This function is only available when activated through settings adjustment (see details in the "Advanced Operation" section).
4. Advanced Operation
4.1. Limited Interference-Free Channels
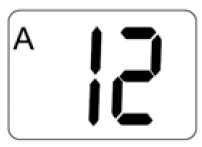
Only channels with significant frequency band separation are available for selection.
This allows multiple WT-300T-G2 transmitters to operate on different channels in close proximity without causing transmission interference.
- Before turning on the device, press and hold the ▼ button and simultaneously turn on the device with the power button ●.
- The default screen
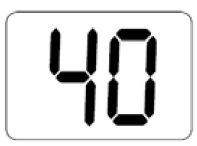 is displayed. Press the ▲ or ▼ buttons to navigate the options.
 - After selecting an option, press the ● button to confirm.
- The device will automatically exit the settings menu and turn on. Press the ▲ or ▼ buttons to navigate the options.
- After selecting an option, press the ● button to confirm.
- The device will automatically exit the settings menu and turn on.
| Symbol on Display | Action |
|---|---|
|
|
All channels are available for selection. |
|
|
Only interference-free channels are available for selection. |
|
Note! Channel numbers displayed on the screen vary depending on frequency. |
|
4.2. Settings Adjustment
Transmitter (Tx)
- Before turning on the device, press and hold the ▲ button and simultaneously turn on the device with the power button ●.
- The default screen
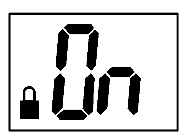 will be displayed. Press ▲ or ▼ to navigate the options.
 - After selecting an option, press the ● button to confirm.
- The device will automatically exit the settings menu and turn on.
| Symbol on Display | Action |
|---|---|
|
Channel Lock
|
The channel shown on the transmitter will be automatically locked when the device is turned on. - ON (default setting) |
Receiver (Rx)
- Before turning on the device, press and hold the ▲ button and simultaneously turn on the device with the power button ●.
- The default screen
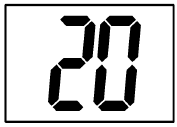 will be displayed. Press ▲ or ▼ to navigate the options.
 - After selecting an option, press the ● button to confirm and enter the next setting.
- The device will automatically exit the settings menu and turn on.
| Symbol on Display | Action |
|---|---|
|
Battery Saving
|
The receiver will automatically turn off after the period of inactivity specified below. - 0 (minutes) |
|
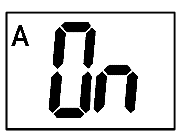
Out-of-Range Alarm
|
The receiver will automatically activate the alarm if it is out of range of a compatible transmitter for 1 minute. - ON |
|
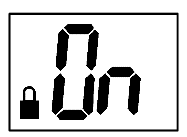
Channel Lock
|
The channel displayed on the receiver will be automatically locked when the device is turned on. - ON (default setting) |
4.3. Reset to Default Settings
Press ▼, ▲ and the power button ● simultaneously to turn on the device – the settings will automatically reset to default. All default settings are shown below.
Transmitter (Tx)
- Channel number: 01
- Channels: All channels are open
- Channel lock: ON
Receiver (Rx)
- Channel number: 01
- Channels: All channels are open
- Battery saving: 20 (minutes)
- Out-of-range alarm: OFF
- Channel lock: ON