



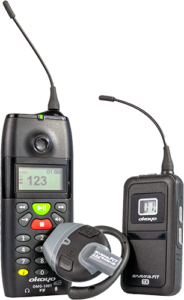
Okayo EarME FIT
Instructions
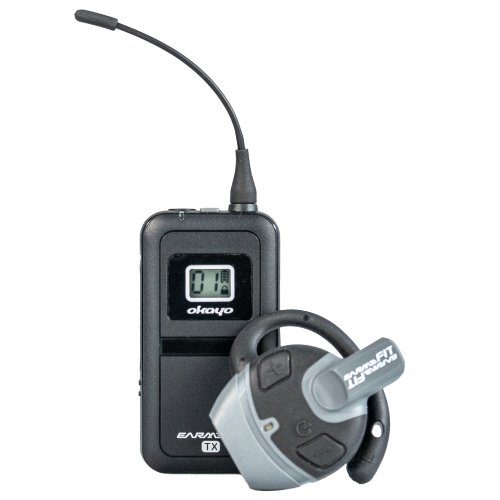
Okayo EarME FIT
(classic transmitter)
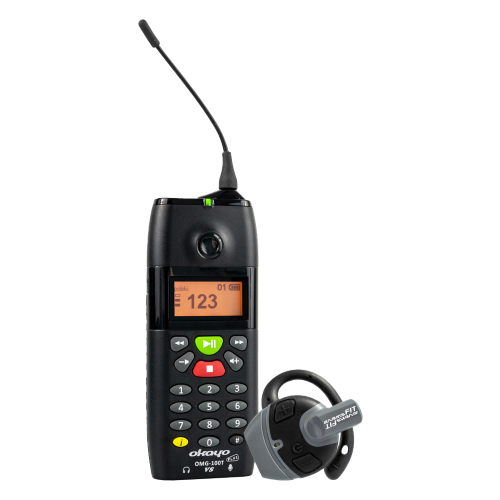
Okayo EarME Player
(transmitter with audio guide function)
Okayo EarME FIT User Manual
1. Creating a group
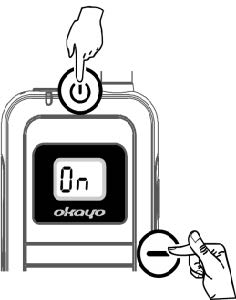
Press and hold the ⏻ and – buttons on the Okayo EarME FIT transmitter to start grouping.
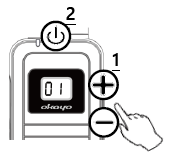
Select the channel using the + and – buttons (1). Confirm by pressing the ⏻ button (2).
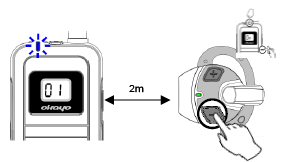
When the pairing indicator flashes on the transmitter, press the ⏻ (-) button on the Okayo EarME FIT receiver to turn it on. The receiver is paired when the LED on the receiver lights up steadily.
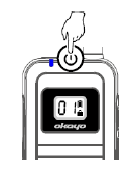
Press the ⏻ button to finish pairing and start the tour!
2. Subsequent use
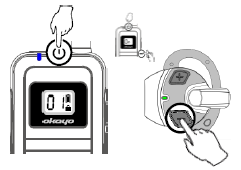
If there are no changes in the group, press the ⏻ button on the transmitter to turn on the device.
3. General settings
Muting the microphone
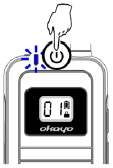
Press the ⏻ button briefly on the transmitter to turn the microphone on/off.
Microphone gain
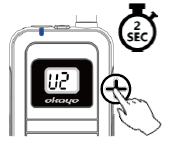
Press and hold the + button on the transmitter until the "U2" symbol appears on the screen. Select the gain level (AU* & U1~U5, default: U2).
* This setting is recommended when connecting the transmitter to an external 3.5 mm audio source. The microphone remains muted.
Adjusting volume
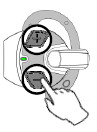
Press the + or – buttons on the receiver to select the volume level.
Checking battery level when the Okayo EarME FIT receiver is off
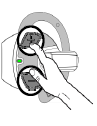
Press the + and – buttons simultaneously to check the battery level when the receiver is off.
| Battery status | LED status |
|---|---|
| 75% ↑ |
Steady green |
| 50% ~ 75% |
Flashing green |
| 25% ~ 50% |
Flashing green and red |
| 25% ↓ |
Steady red (30 min remaining) |
⚠ Battery warning
- Charge the device regularly when the battery level drops below 50%.
- Ensure that the devices are fully charged before long-term storage.
- If the device overheats or exhibits unusual battery life or behavior, contact service.
Power saving
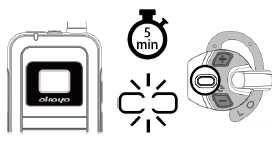
After 5 minutes without receiving a signal, the receiver turns off automatically.
4. Joining a group during a tour
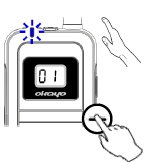
Press the – button on the transmitter to start pairing during the tour.
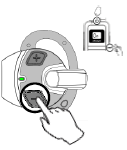
Press the ⏻ button on the new receiver to turn it on. The new receiver is paired if the LED lights up steadily.
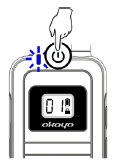
Press the ⏻ button briefly on the transmitter to finish pairing and resume the tour!
5. Remote channel change
If there is a need to change the group channel, you can do so at any time.
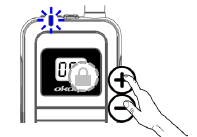
Press and hold the + and – buttons on the receiver to unlock the channel change function. Select the channel using the + or – buttons. After 1 second, the channel will be automatically confirmed.
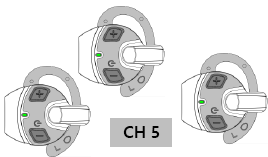
All FT-1 receivers will be automatically moved to the new channel.
6. Remote tour termination
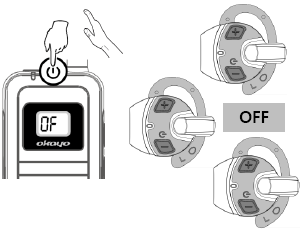
When the transmitter is turned off, all receivers will turn off automatically.
7. LED indicators
| Status | Okayo EarME FIT T (transmitter) | Okayo EarME FIT R (receiver) |
|---|---|---|
| High power |
Blue |
Green |
| Low power |
Red |
|
| During pairing |
Flashing rapidly |
|
| Device paired |
Steady light |
|
| Mute |
Flashing slowly |
– |
8. Battery level (transmitter)
| Battery charge percentage | Display symbol |
|---|---|
| 50% 🠕 |
|
| 5~50% 🠕 |
|
| 5% 🠗 |
|


Okayo EarME Player User Manual
- Okayo EarME Player is a transmitter with pre-recorded audio that must be uploaded to the device using Audio Master 3 (VS) software.
- Using Okayo EarME Player, the guide can either speak or quickly and easily share pre-recorded broadcasts with tour participants on their Okayo EarME FIT receivers.
1. Interface
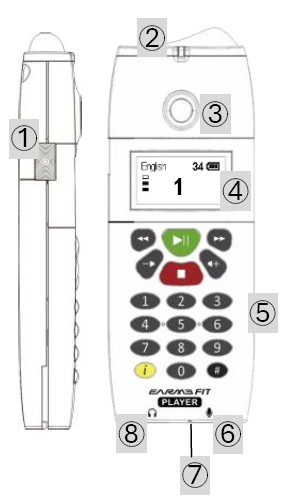
- Microphone on/off button (mute)
- Signal/power indicator
- Built-in speaker
- Display
- Keypad
- 3.5 mm microphone input jack
- Built-in microphone
- 3.5 mm headphone input jack
- Power / multifunction button
2. Battery indicator
| Battery charge level | Indicator color | |
|---|---|---|
|
|
>50% |
green |
|
|
30~50% |
green |
|
|
10~30% |
green |
|
|
< 10% |
red |


⚠ Battery warning
- Charge the device regularly when the battery level drops below 50%.
- Ensure that the devices are fully charged before long-term storage.
- If the device overheats or exhibits unusual battery life or behavior, contact service.
3. Language selection (01~32)
- Press and hold the red ⏹︎ button on the keypad to turn on the device.
- Press the following buttons on the keypad in sequence: #, then 1 on the keypad. Confirm with the button to enter the language selection settings.
- Select the language using the ◀ or ▶ buttons, then press the ⏯ button to confirm/exit the settings.
4. Pairing devices before starting the tour
- Press the red ⏹︎ button on the keypad to turn on the device.
- Press the # button on the keypad, then the green ⏯ button to enter pairing mode—the channel number in the upper right corner of the display will start flashing.
- Press the ◀ or ▶ buttons on the keypad to select the channel, then press the green ⏯ button to confirm. The selected channel number flashes rapidly.
- Press the ⏻ (-) button on the Okayo EarME FIT receiver to turn on the receiver—the flashing LEDs will change to steady after pairing.
- Press the red ⏹︎ button on the keypad to finish pairing and start the tour.
5. Talk/mute mode during the tour
- The microphone is on by default when the Okayo EarME Player device is turned on.
- Press the "Mic" button on the left side of the device to turn off (🔇) the microphone or turn it back on.
6. Okayo EarME FIT receiver interface
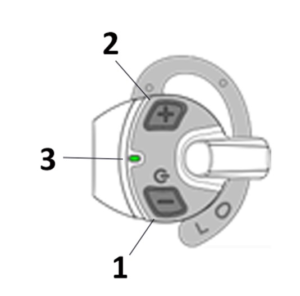
- Power on/volume down button
- Volume up button
- Signal/battery level indicator
7. Battery indicator in the Okayo EarME FIT receiver
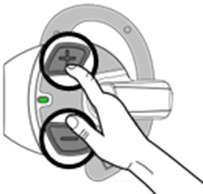
Press the + and - buttons simultaneously when the device is off to check the battery charge level.
| Battery charge level | LED indicator |
|---|---|
|
> 75% |
steady green |
|
50~75% |
flashing green |
|
25~50% |
flashing green and red |
|
< 25% |
steady red (approximately 30 minutes of battery operation remaining) |
8. Playing pre-recorded broadcasts
- To play a pre-recorded broadcast for tour participants, press the broadcast number on the Okayo EarME Player transmitter keypad, then press the green ⏯ button to start playback.
- During the broadcast, the microphone is muted (🔇).
9. Remote channel change in all receivers
Changing the channel is recommended when interference occurs.
- Press and hold the ◀ and ▶ buttons on the keypad to unlock the transmitter.
- Select any channel using the ◀ and ▶ buttons, then confirm by pressing the green ⏯ button on the keypad.
- All Okayo EarME FIT receivers will be moved to the selected channel.
10. Remote tour termination
The receivers of all group participants will be remotely turned off when the Okayo EarME Player device is turned off by holding the red ⏹︎ button on the keypad.
11. Charging via USB-A cable
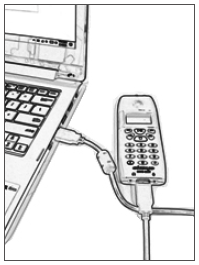
To charge the player directly using a data cable, press the # button after connecting it to the computer. The player will start charging when the 🔌 symbol appears on the screen.
12. LED indicators in the devices
| Okayo EarME Player (transmitter with audio guide function) | Okayo EarME FIT R (receiver) | |
|---|---|---|
|
green LED |
high battery charge level |
|
|
red LED |
low battery charge level |
|
|
flashing green and red |
device on / microphone on |
receiver connected to group |
|
flashing LED |
microphone off |
receiver outside group |